> ## Documentation Index
> Fetch the complete documentation index at: https://docs.quick.bot/llms.txt
> Use this file to discover all available pages before exploring further.
# HTTP Request
export const YoutubeVideo = ({id}) =>
;
The HTTP Request block allows you to send HTTP requests to external services and APIs. This powerful
integration enables you to connect your bot with virtually any web service, send data, retrieve
information, and automate workflows.
## Configuration Options
### Basic Configuration
* **URL**: The endpoint URL where the request will be sent (supports variable interpolation)
* **Method**: HTTP method (GET, POST, PUT, PATCH, DELETE, HEAD, CONNECT, OPTIONS, TRACE)
* **Execution Location**: Choose between server-side or client-side execution
### Advanced Configuration
* **Query Parameters**: Add URL query parameters with variable support
* **Headers**: Set custom HTTP headers including authentication tokens
* **Custom Body**: Define request body with JSON, form data, or custom formats
* **Timeout**: Configure request timeout (1-600000ms, default: 10000ms)
* **Variable Mapping**: Map response data to bot variables for reuse
## Features
### Variable Support
The HTTP Request block fully supports QuickBot variables in:
* URL endpoints
* Query parameters
* Headers
* Request body
* Test values for debugging
### Response Processing
* Automatic JSON response parsing
* Deep key extraction from nested objects
* Variable mapping from response data
* Test response preview with syntax highlighting
### Error Handling
* Request timeout management
* HTTP status code handling
* Detailed error messages in logs
* Test mode for debugging before deployment
## Advanced Features
### Custom Request Body
Enable custom body to send structured data with your variables:
```json theme={null}
{
"name": "{{Name}}",
"email": "{{Email}}",
"timestamp": "{{Now}}",
"metadata": {
"source": "quickbot",
"bot_id": "{{Bot ID}}"
}
}
```
### Authentication Headers
Add authentication headers for secure API access:
* `Authorization: Bearer {{API_Token}}`
* `X-API-Key: {{API_Key}}`
* `Content-Type: application/json`
### Query Parameters
Add dynamic query parameters:
* `user_id={{User_ID}}`
* `timestamp={{Now}}`
* `format=json`
### Response Variable Mapping
Map API response data to bot variables for later use:
* Extract user information from API responses
* Store calculated values
* Capture IDs for follow-up requests
## Examples
### Example: Employee Management API
This video demonstrates configuring HTTP Request blocks for CREATE and GET operations:
### Example: Movie Information API
Create a bot that fetches movie information from OMDB API:
**Step 1: Configure URL with Variables**
```
http://www.omdbapi.com/?t={{Movie_Title}}&apikey={{OMDB_API_Key}}
```
**Step 2: Set Test Values** Configure test values to preview the request:
**Step 3: Test and Map Response** Test the request and map response data to variables:
**Step 4: Use Response Data** Display the retrieved information in subsequent blocks:
### Integration Capabilities
* Connect with any REST API
* Support for GraphQL endpoints
* HTTP-based triggers for real-time updates
* Third-party service integrations (Zapier, Make.com, etc.)
* Custom authentication flows
* Data transformation and validation
Need help setting up an HTTP Request? Join our [community](https://discord.com/invite/U3rs3rPPQ4)
for assistance.
## Third-Party Integration
### Quick Setup for Automation Services
For services like Make.com, Zapier, or Pabbly Connect:
1. **Get Webhook URL**: Copy the webhook URL from your automation platform
2. **Paste URL**: Enter the URL in the HTTP Request block
3. **Test Request**: Click "Test the request" to send sample data
4. **Customize Payload**: Modify the request body to include specific bot data
### Custom Payload Configuration
Tailor the data sent to your automation service:
```json theme={null}
{
"bot_id": "{{Bot ID}}",
"user_data": {
"name": "{{Name}}",
"email": "{{Email}}",
"phone": "{{Phone}}"
},
"form_data": {
"message": "{{Message}}",
"timestamp": "{{Now}}"
},
"metadata": {
"source": "quickbot_http_request",
"conversation_id": "{{Conversation ID}}"
}
}
```
## Advanced Configuration
### Timeout Settings
* **Default Timeout**: 10 seconds (10,000ms)
* **Configurable Range**: 1ms to 600,000ms (10 minutes)
* **Failure Behavior**: Block fails if timeout exceeded
* **Location**: Advanced Parameters section
### Execution Context
* **Server-side Execution**: Secure, hidden from client, supports all HTTP methods
* **Client-side Execution**: Faster for simple requests, CORS restrictions may apply
* **Default**: Server-side execution recommended for security
### Request Methods
Supported HTTP methods:
* **GET**: Retrieve data from APIs
* **POST**: Create new resources or send data
* **PUT**: Update existing resources completely
* **PATCH**: Partial resource updates
* **DELETE**: Remove resources
* **HEAD**: Get headers without body
* **OPTIONS**: Check supported methods
* **CONNECT/TRACE**: Advanced networking (rarely used)
## Troubleshooting
### Common Configuration Issues
**Request Failures**
* Check the [logs](/builder/results/table) for detailed error messages
* Verify URL format and accessibility
* Confirm API endpoint accepts your HTTP method
* Validate authentication headers and credentials
**Variable-Related Problems**
* Ensure variables exist before using in requests
* Check variable names match exactly (case-sensitive)
* Verify test values are set for debugging
* Confirm variable interpolation syntax: `{{Variable_Name}}`
**Response Mapping Issues**
* Verify response structure matches mapping configuration
* Check that response keys exist in API response
* Ensure proper JSON format in API response
* Test response structure with "Test the request" feature
### Platform-Specific Considerations
**CORS Errors (Client-side Execution)**
* Switch to server-side execution for cross-origin requests
* Contact API provider about CORS policy
* Use proxy endpoints when necessary
**Execution Order** HTTP Requests execute in sequence during block processing:
* All blocks between user inputs are computed server-side
* Results are processed before displaying to user
* Use proper flow design for dependent HTTP Request calls
**Authentication Failures**
* Verify API key/token validity and permissions
* Check authentication method (Bearer token, API key header, etc.)
* Ensure credentials are stored in variables, not hardcoded
* Test authentication with API documentation examples
### Performance Issues
* Increase timeout for slow APIs
* Optimize request payload size
* Consider caching for frequently requested data
* Monitor API rate limits and usage quotas
Need additional help? Contact support through the chat button in the QuickBot interface.
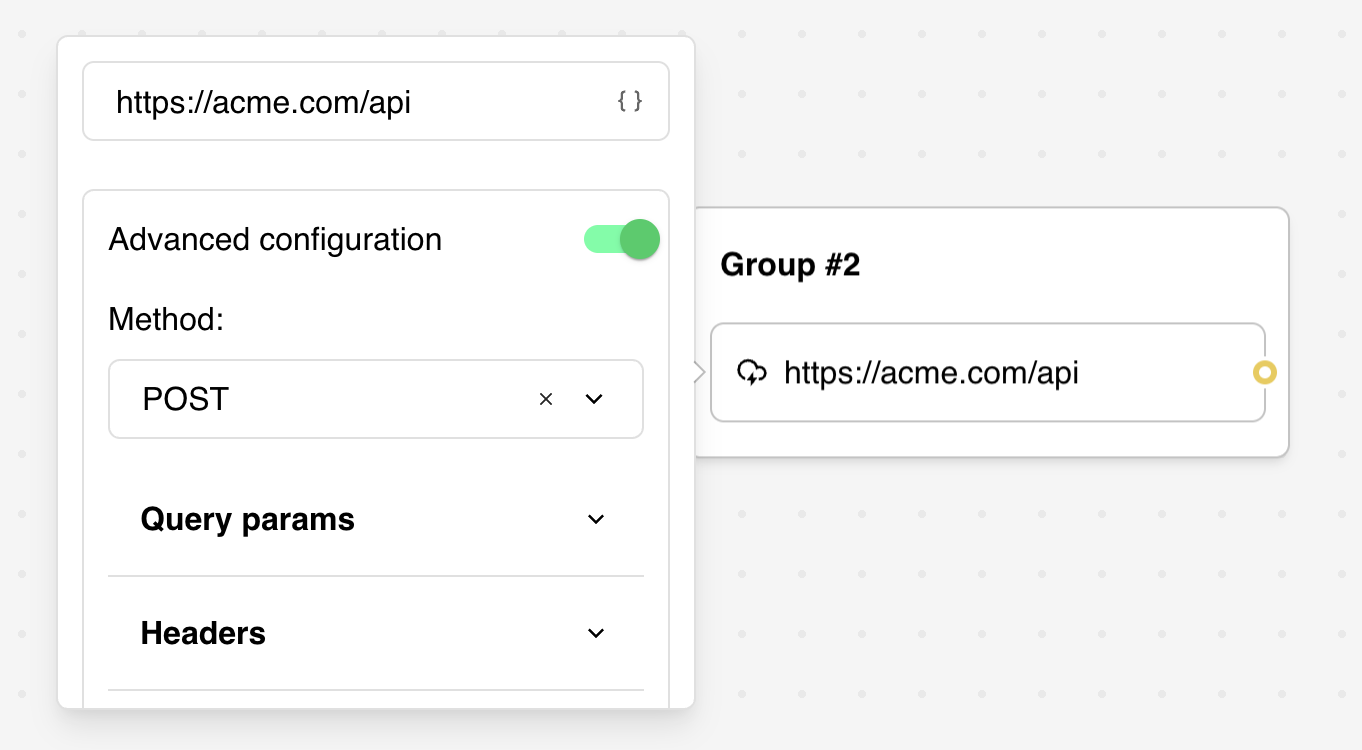 **Step 2: Set Test Values** Configure test values to preview the request:
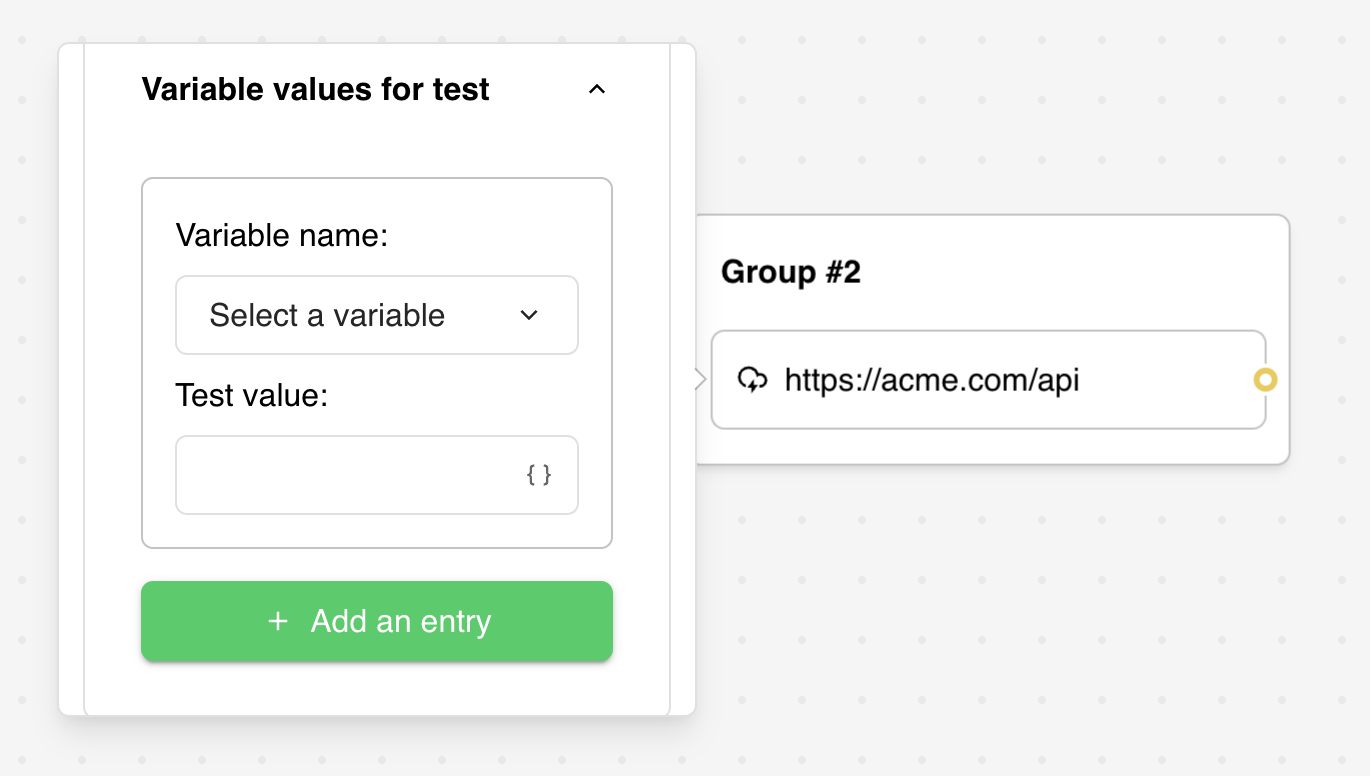 **Step 3: Test and Map Response** Test the request and map response data to variables:
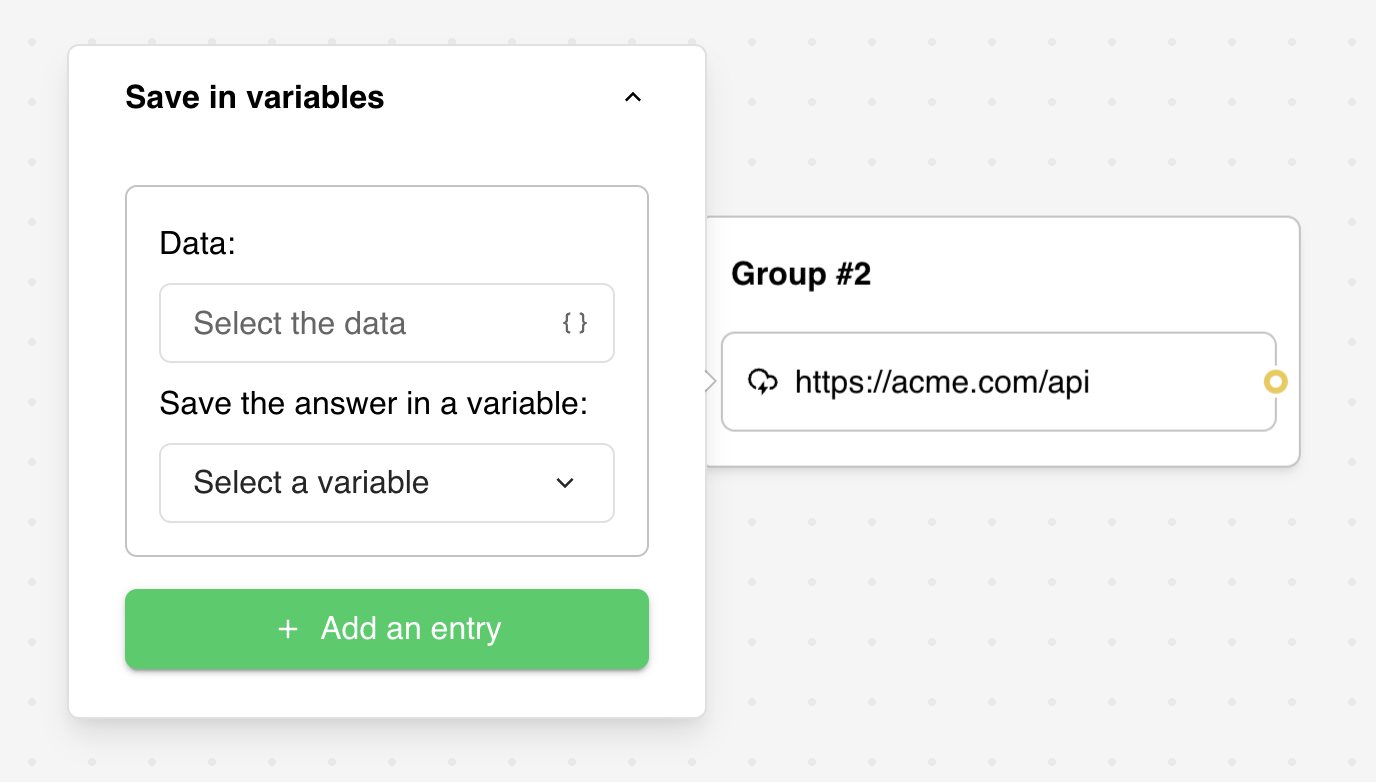 **Step 4: Use Response Data** Display the retrieved information in subsequent blocks:
### Integration Capabilities
* Connect with any REST API
* Support for GraphQL endpoints
* HTTP-based triggers for real-time updates
* Third-party service integrations (Zapier, Make.com, etc.)
* Custom authentication flows
* Data transformation and validation
Need help setting up an HTTP Request? Join our [community](https://discord.com/invite/U3rs3rPPQ4)
for assistance.
## Third-Party Integration
### Quick Setup for Automation Services
For services like Make.com, Zapier, or Pabbly Connect:
1. **Get Webhook URL**: Copy the webhook URL from your automation platform
2. **Paste URL**: Enter the URL in the HTTP Request block
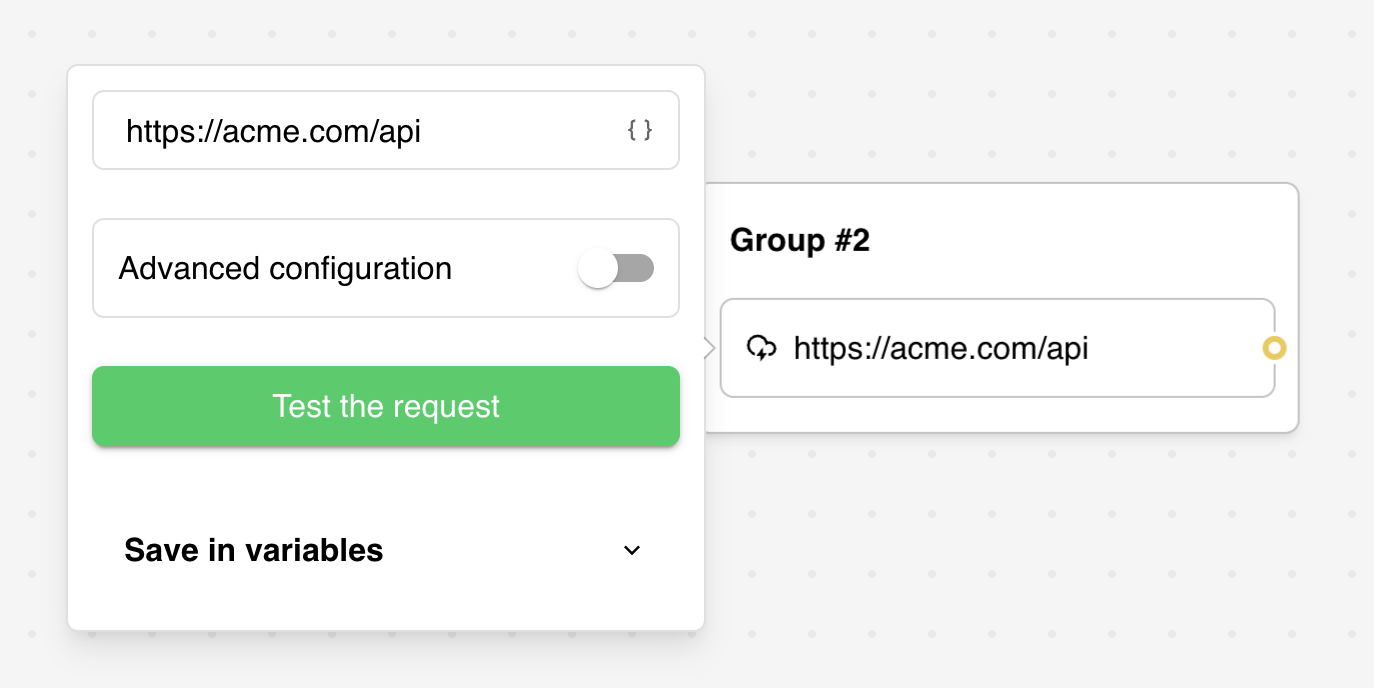
3. **Test Request**: Click "Test the request" to send sample data
4. **Customize Payload**: Modify the request body to include specific bot data
**Step 4: Use Response Data** Display the retrieved information in subsequent blocks:
### Integration Capabilities
* Connect with any REST API
* Support for GraphQL endpoints
* HTTP-based triggers for real-time updates
* Third-party service integrations (Zapier, Make.com, etc.)
* Custom authentication flows
* Data transformation and validation
Need help setting up an HTTP Request? Join our [community](https://discord.com/invite/U3rs3rPPQ4)
for assistance.
## Third-Party Integration
### Quick Setup for Automation Services
For services like Make.com, Zapier, or Pabbly Connect:
1. **Get Webhook URL**: Copy the webhook URL from your automation platform
2. **Paste URL**: Enter the URL in the HTTP Request block
3. **Test Request**: Click "Test the request" to send sample data
4. **Customize Payload**: Modify the request body to include specific bot data
 ### Custom Payload Configuration
Tailor the data sent to your automation service:
```json theme={null}
{
"bot_id": "{{Bot ID}}",
"user_data": {
"name": "{{Name}}",
"email": "{{Email}}",
"phone": "{{Phone}}"
},
"form_data": {
"message": "{{Message}}",
"timestamp": "{{Now}}"
},
"metadata": {
"source": "quickbot_http_request",
"conversation_id": "{{Conversation ID}}"
}
}
```
## Advanced Configuration
### Timeout Settings
* **Default Timeout**: 10 seconds (10,000ms)
* **Configurable Range**: 1ms to 600,000ms (10 minutes)
* **Failure Behavior**: Block fails if timeout exceeded
* **Location**: Advanced Parameters section
### Execution Context
* **Server-side Execution**: Secure, hidden from client, supports all HTTP methods
* **Client-side Execution**: Faster for simple requests, CORS restrictions may apply
* **Default**: Server-side execution recommended for security
### Request Methods
Supported HTTP methods:
* **GET**: Retrieve data from APIs
* **POST**: Create new resources or send data
* **PUT**: Update existing resources completely
* **PATCH**: Partial resource updates
* **DELETE**: Remove resources
* **HEAD**: Get headers without body
* **OPTIONS**: Check supported methods
* **CONNECT/TRACE**: Advanced networking (rarely used)
## Troubleshooting
### Common Configuration Issues
**Request Failures**
* Check the [logs](/builder/results/table) for detailed error messages
* Verify URL format and accessibility
* Confirm API endpoint accepts your HTTP method
* Validate authentication headers and credentials
**Variable-Related Problems**
* Ensure variables exist before using in requests
* Check variable names match exactly (case-sensitive)
* Verify test values are set for debugging
* Confirm variable interpolation syntax: `{{Variable_Name}}`
**Response Mapping Issues**
* Verify response structure matches mapping configuration
* Check that response keys exist in API response
* Ensure proper JSON format in API response
* Test response structure with "Test the request" feature
### Platform-Specific Considerations
**CORS Errors (Client-side Execution)**
* Switch to server-side execution for cross-origin requests
* Contact API provider about CORS policy
* Use proxy endpoints when necessary
**Execution Order** HTTP Requests execute in sequence during block processing:
* All blocks between user inputs are computed server-side
* Results are processed before displaying to user
* Use proper flow design for dependent HTTP Request calls
**Authentication Failures**
* Verify API key/token validity and permissions
* Check authentication method (Bearer token, API key header, etc.)
* Ensure credentials are stored in variables, not hardcoded
* Test authentication with API documentation examples
### Performance Issues
* Increase timeout for slow APIs
* Optimize request payload size
* Consider caching for frequently requested data
* Monitor API rate limits and usage quotas
### Custom Payload Configuration
Tailor the data sent to your automation service:
```json theme={null}
{
"bot_id": "{{Bot ID}}",
"user_data": {
"name": "{{Name}}",
"email": "{{Email}}",
"phone": "{{Phone}}"
},
"form_data": {
"message": "{{Message}}",
"timestamp": "{{Now}}"
},
"metadata": {
"source": "quickbot_http_request",
"conversation_id": "{{Conversation ID}}"
}
}
```
## Advanced Configuration
### Timeout Settings
* **Default Timeout**: 10 seconds (10,000ms)
* **Configurable Range**: 1ms to 600,000ms (10 minutes)
* **Failure Behavior**: Block fails if timeout exceeded
* **Location**: Advanced Parameters section
### Execution Context
* **Server-side Execution**: Secure, hidden from client, supports all HTTP methods
* **Client-side Execution**: Faster for simple requests, CORS restrictions may apply
* **Default**: Server-side execution recommended for security
### Request Methods
Supported HTTP methods:
* **GET**: Retrieve data from APIs
* **POST**: Create new resources or send data
* **PUT**: Update existing resources completely
* **PATCH**: Partial resource updates
* **DELETE**: Remove resources
* **HEAD**: Get headers without body
* **OPTIONS**: Check supported methods
* **CONNECT/TRACE**: Advanced networking (rarely used)
## Troubleshooting
### Common Configuration Issues
**Request Failures**
* Check the [logs](/builder/results/table) for detailed error messages
* Verify URL format and accessibility
* Confirm API endpoint accepts your HTTP method
* Validate authentication headers and credentials
**Variable-Related Problems**
* Ensure variables exist before using in requests
* Check variable names match exactly (case-sensitive)
* Verify test values are set for debugging
* Confirm variable interpolation syntax: `{{Variable_Name}}`
**Response Mapping Issues**
* Verify response structure matches mapping configuration
* Check that response keys exist in API response
* Ensure proper JSON format in API response
* Test response structure with "Test the request" feature
### Platform-Specific Considerations
**CORS Errors (Client-side Execution)**
* Switch to server-side execution for cross-origin requests
* Contact API provider about CORS policy
* Use proxy endpoints when necessary
**Execution Order** HTTP Requests execute in sequence during block processing:
* All blocks between user inputs are computed server-side
* Results are processed before displaying to user
* Use proper flow design for dependent HTTP Request calls
**Authentication Failures**
* Verify API key/token validity and permissions
* Check authentication method (Bearer token, API key header, etc.)
* Ensure credentials are stored in variables, not hardcoded
* Test authentication with API documentation examples
### Performance Issues
* Increase timeout for slow APIs
* Optimize request payload size
* Consider caching for frequently requested data
* Monitor API rate limits and usage quotas